How Mirror Puzzles Work
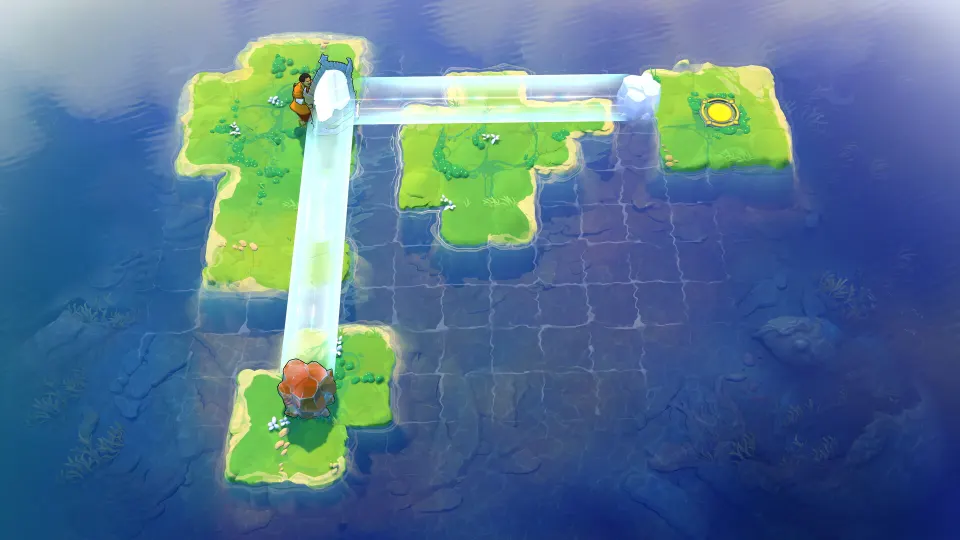
A mirror can move you onto a passing lily pad or transfer a crystal across water, opening routes that walking alone cannot reach. In Order of the Sinking Star, solving these layouts means planning both your destination and where you activate the mirror.
Mirror challenges appear in The Mirror Isles and continue in combination areas. The walkthroughs below cover opening puzzles in Mirrors and Stones and Heroes and Mirrors.
| Element | Role in these puzzles | What to check |
|---|---|---|
| Mirrors | Transfer characters or crystals between positions | Alignment with the intended destination |
| Crystals | Create usable submerged tiles in certain water layouts | Where the crystal lands after activation |
| Skipping stones | Redirect lily pads through pushes into water | The pad's route after the push |
| Buttons | Control access through barriers | Whether a character or object must occupy them |
Read directions as individual grid movements:
- A direction without a number means one square.
- A numbered direction means that many squares.
- “To its limit” means continue until a barrier or the path's end stops movement.
Keep mirror movement separate from character movement: repositioning a mirror and preparing to activate it are different steps.
Where to Find Mirror Puzzles
Identify the region before following a numbered solution. Each combination area has its own entrance.
| Area | Location or connection | Access requirement |
|---|---|---|
| The Mirror Isles | Mirror-focused region connected to later combination areas | Progress here contributes to reaching the combination areas |
| Mirrors and Stones | Southeast area beyond the MxS gold room | Advance in Skipping Stones and The Mirror Isles, then open MxS |
| Heroes and Mirrors | Northeast area beyond the HxM gold room | Unlock a golden mirror in The Mirror Isles and follow the route in The Hearty Heroes of Hauling |
For Mirrors and Stones, use the bottom exit of the MxS gold room. For Heroes and Mirrors, finish the gold-room challenges to release a crystal on the golden platform. Push it right to establish the onward route.
Screen and puzzle labels follow Game Rant's Mirrors and Stones walkthrough and Heroes and Mirrors walkthrough. Match the area and layout before applying movement counts.
Mirrors and Stones: Opening Solutions
Screen 1: Bottom Puzzle
Prepare orange's mirror before setting the crystal-carrying lily pad in motion.
- With orange, push the mirror into the upper-left corner of his island. Move orange clear of its path.
- With teal, push the crystal onto the lily pad.
- Push the skipping stone right, then downward to its limit. This sends the pad and crystal left.
- Activate the mirror as the pad enters its column. The crystal transfers to orange's island.
- Have orange push the crystal upward into the water, creating access to the upper teleporter.
Completing this puzzle clears the barrier leading to the next screen.
Screen 2: Entering the Puzzle Area
Watch the lily pad traveling in the lower-left current. When it reaches that current's lower-right corner, board the accessible lily pad. Use the mirror to transfer to the lower-left pad and reach the puzzle entrances.
Screen 2: Bottom-Left Puzzle 1
Mirror 1 is on the left island; mirror 2 is on the middle island.
- Push mirror 1 up four squares and right four. Walk left four squares, then activate it to reach the middle island.
- Push mirror 2 left two and up three. Walk down two squares and teleport above the skipping stone.
- Push the stone down one, left three, up two, and left two. Push it upward across the water to the left island.
Next, position both mirrors for the crossing:
- Move mirror 2 down two squares, then right to its limit.
- Enter mirror 1's column and activate it to return to the left island.
- Push mirror 1 left four squares, then down to its limit.
With both mirrors ready, launch and board the pad:
- Position the stone in the column immediately left of the lily pad. Push it downward into the water to send the pad right.
- Step left and activate the mirror to board the pad.
- When the pad reaches mirror 2's column, activate the mirror again to reach the teleporter.
Screen 2: Bottom-Left Puzzle 2
Two submerged crystals provide the positions needed to launch the lily pad.
- Move the mirror left two squares and up three.
- Push the right crystal into the mirror's column, then downward to its limit. Activate the mirror to submerge it in the column immediately left of the pad.
- Move the mirror left one square and down one.
- Push the remaining crystal into the island's lower-left corner. Activate the mirror to place it underwater directly below the first crystal.
Use these submerged positions to move the stone:
- Move the mirror up one square.
- Push the skipping stone onto the lower submerged crystal.
- Teleport onto the upper submerged crystal.
- Push the stone downward into the water, sending the pad right.
- Quickly teleport back to the island and board the passing pad to reach the teleporter.
Heroes and Mirrors: Opening Solutions
Reach the Bottom Puzzles on Screen 1
First, complete the middle puzzle on Screen 2. This clears a barrier in the corridor between Screens 1 and 2.
- Step onto the reset tile at Screen 2's lower-left corner.
- Push the nearby lower-left mirror right to its limit.
- Continue moving it up one, right two, down six, left two, and up one square.
- Check its position on Screen 1: it should be five squares right of the blue button.
- Stand on the blue button and activate the mirror to enter the bottom puzzles.
Screen 1: Bottom Puzzle 1
The pink button must be occupied and released at different points.
- Push the mirror right two squares, then walk around to its right side.
- Activate the mirror and push it onto the pink button.
- Push the crystal down three squares.
- Move the mirror up two squares and right two, then stand on the pink button.
Now use the crystal to control the barriers:
- Activate the mirror to transfer the crystal. Push the crystal onto the pink button.
- Move the mirror left two squares so it sits above the crystal.
- Walk beyond the first barriers. Activate the mirror to remove the crystal from the button, then continue to the teleporter.
Screen 1: Bottom Puzzle 2
Start with green standing on the green button. Use orange to prepare his mirror, then leave him on the pink button while green arranges hers.
| Character | Mirror preparation | Position before activation |
|---|---|---|
| Orange | Push his mirror down one square and right five, aligning it with his pink button | Stand on the pink button |
| Green | Pull her mirror up one square and left five, aligning it with her green button | Return to the green button |
With both characters on their buttons, activate the mirrors to send them to their teleporters. Completion removes two barriers on Screen 1.
Common Mirror Puzzle Roadblocks
When a route seems impossible, check the destination and activation position before moving more objects.
| Roadblock | Useful check |
|---|---|
| The lily pad is unreachable on foot | Look for a position from which the mirror can transfer you onto it |
| The crystal stays on the moving pad | Check whether the pad has entered the mirror's column |
| Screen 1's bottom puzzles remain inaccessible in Heroes and Mirrors | Complete Screen 2's middle puzzle and reposition the corridor mirror |
| The final route is blocked in Heroes and Mirrors Bottom Puzzle 1 | Remove the crystal from the pink button after passing the first barriers |
Before starting a timed water sequence:
- Finish positioning every mirror needed for the crossing.
- Identify the pad's boarding point and destination column.
- Keep the return teleport available when leaving a submerged crystal.
FAQ
What should I check first in order of the sinking star mirror puzzles?
Check the mirror's alignment, your activation position, and the destination tile. In water layouts, consider whether the destination becomes available when a lily pad passes.
Do I need to walk onto every lily pad?
No. Screen 2's first bottom-left Mirrors and Stones puzzle uses a mirror to board a pad after a stone sends it right. Another mirror transfer completes the crossing.
How do I enter Mirrors and Stones?
Progress in Skipping Stones and The Mirror Isles, open the MxS gold room, and take its bottom exit.
Why can't I access Heroes and Mirrors Screen 1's bottom puzzles?
Finish Screen 2's middle puzzle. Then use the lower-left reset tile, move the nearby mirror through the connecting corridor, and activate it while standing on Screen 1's blue button.